Easy DIY T-Shirts Perfect for Summer

fullsizeoutput_44dfullsizeoutput_44efullsizeoutput_458fullsizeoutput_457
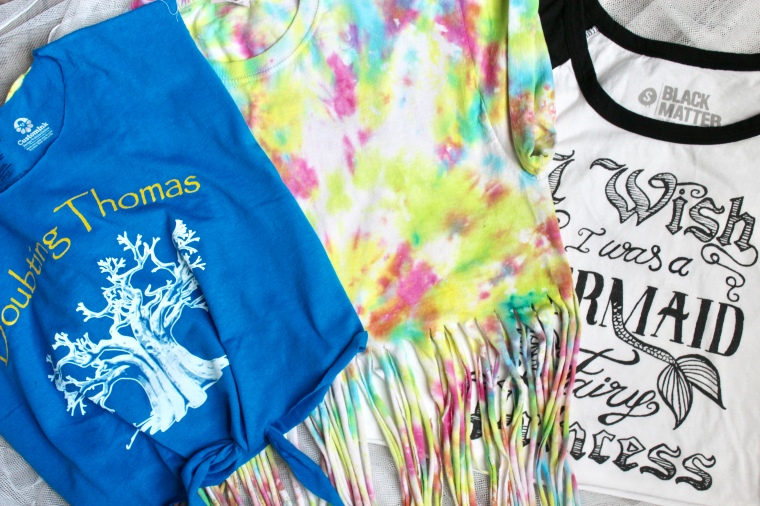
Summer is almost here! Here are a few DIY shirts to start off my summer posts!fullsizeoutput_12c

I have had this shirt for over a year and never wear it because it doesn’t lay right on me, so I decided to turn it into a crop top. The first step is deciding how long you want your shirt. Once you’ve decided on the length draw a line in pencil across the shirt, so you know where to cut(if you want to hym it leave an extra half inch).

fullsizeoutput_345fullsizeoutput_346

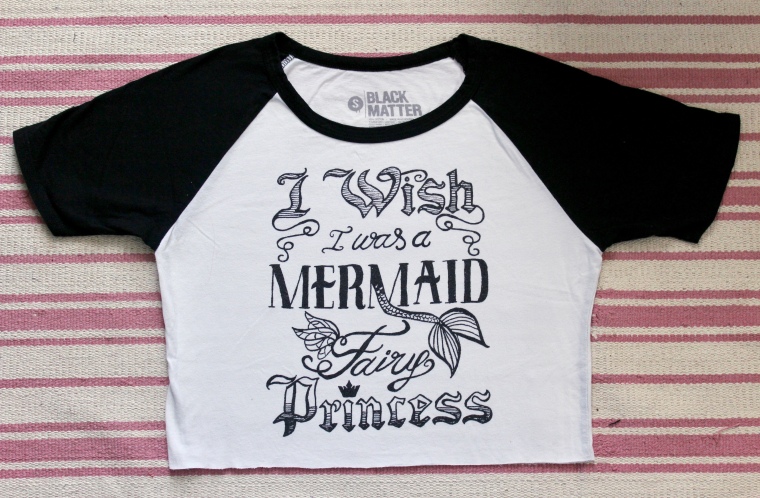
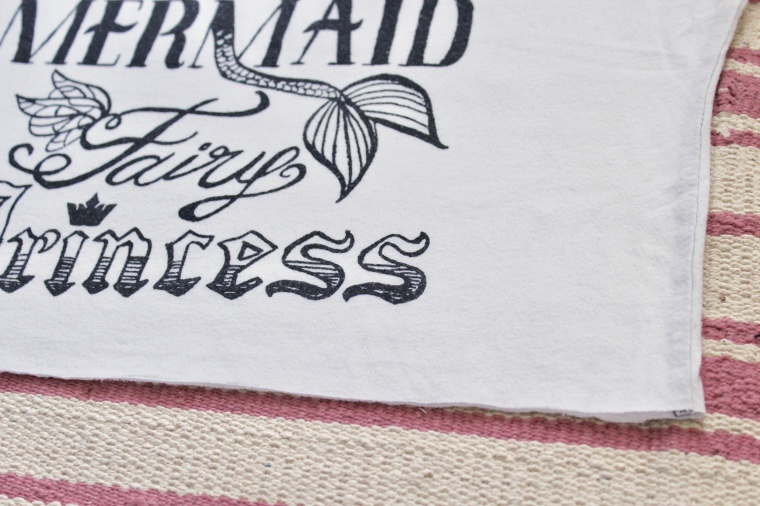
After you cut the shirt pull the bottom of the shirt to make the edges roll in and your done! A crop top perfect for summer.

fullsizeoutput_347IMG_2129

fullsizeoutput_12e

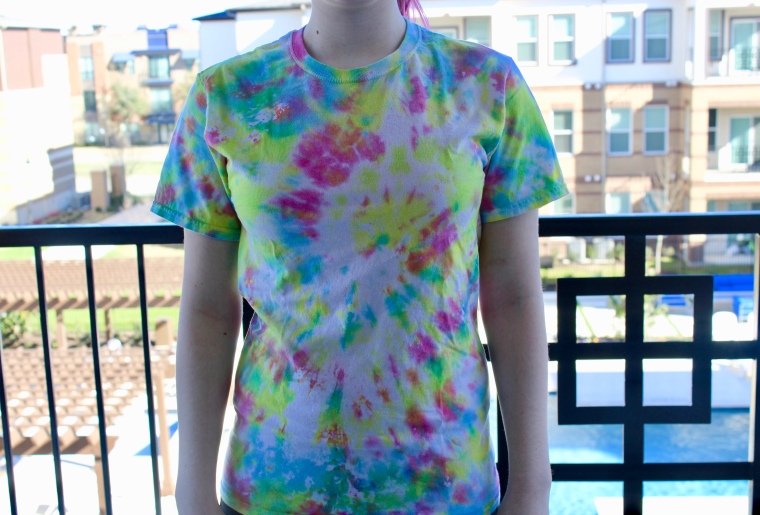
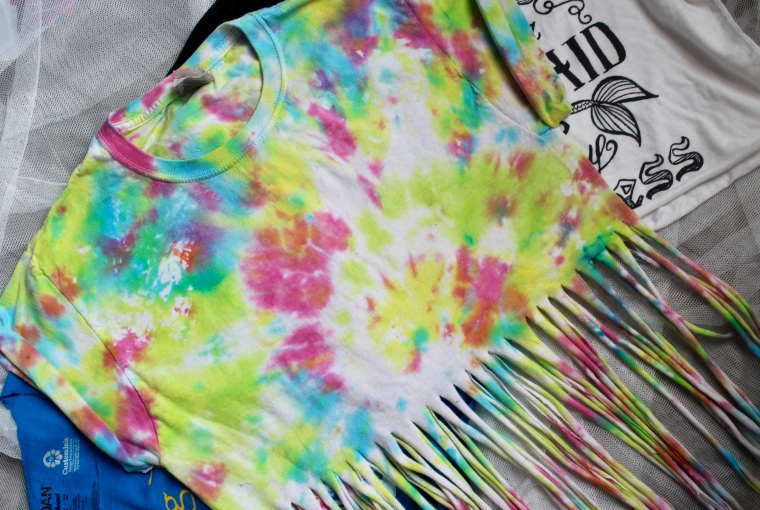
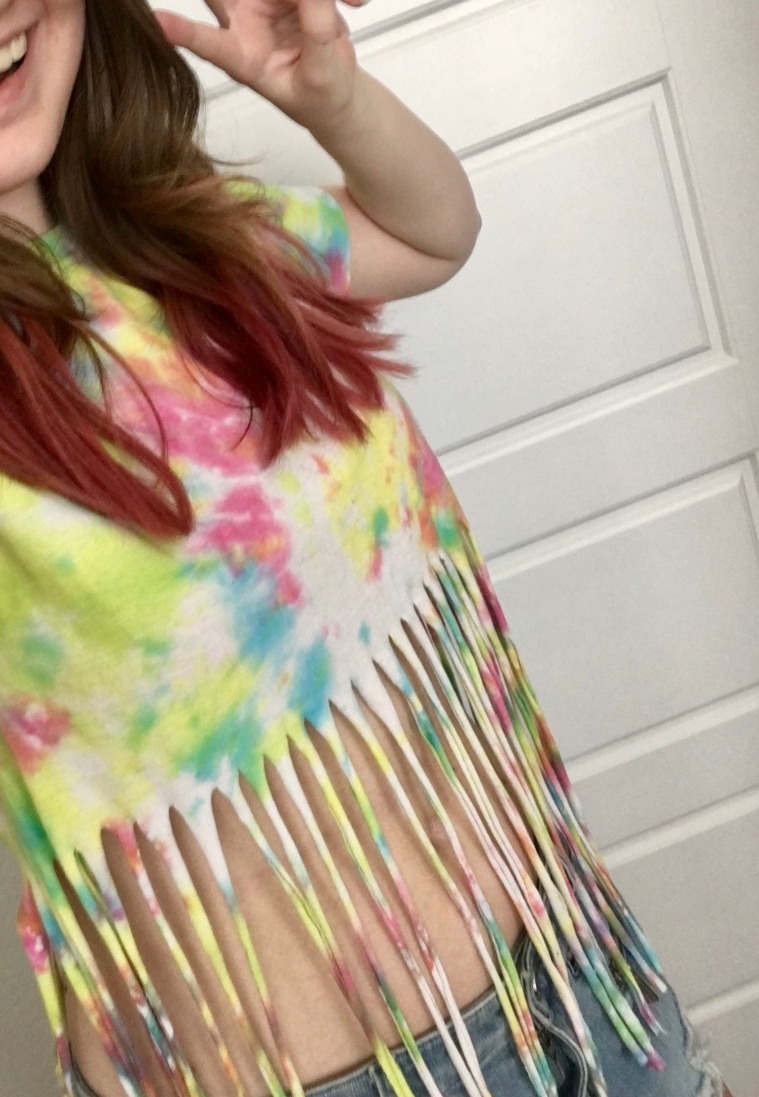
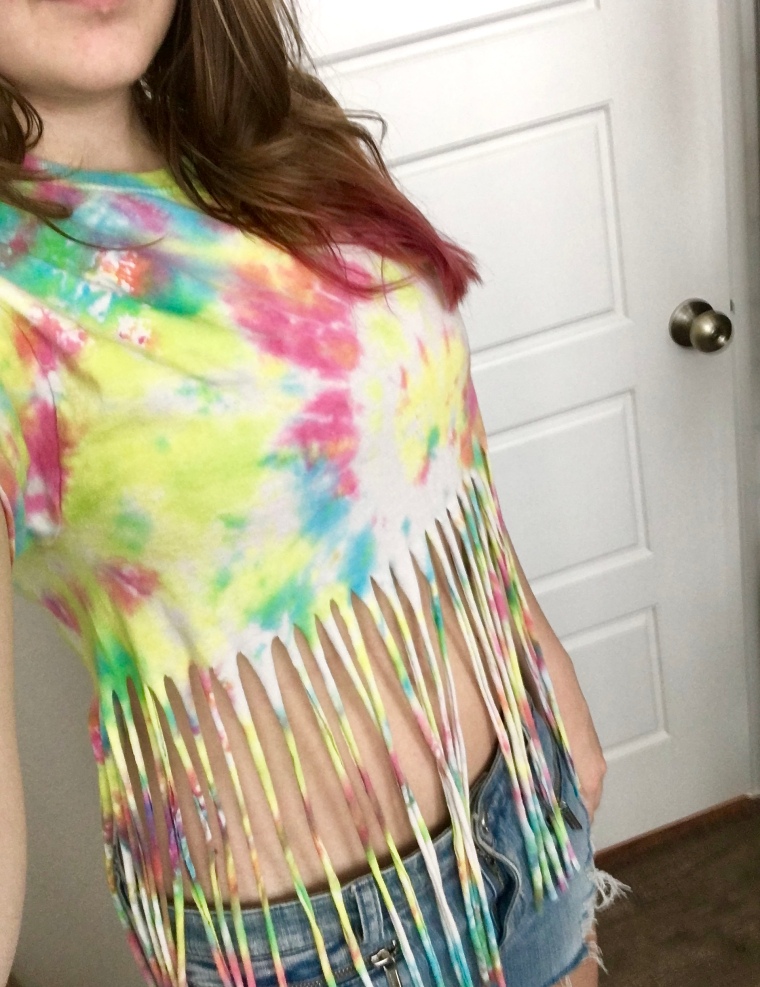
My friend visited last summer and we tie-dyed a ton of shirts. Having them all the same became old really quickly so I grabbed a pair of scissors and made a few adjustments. The first step is to cut off the bottom piece of the shirt, so it looks nicer at the end. Just like the other shirt measure how short you want it to be and draw a line in pencil. Once you know how long you want it lay in flat on the floor and start cutting strips from the bottom of the shirt to your line.

fullsizeoutput_1a2
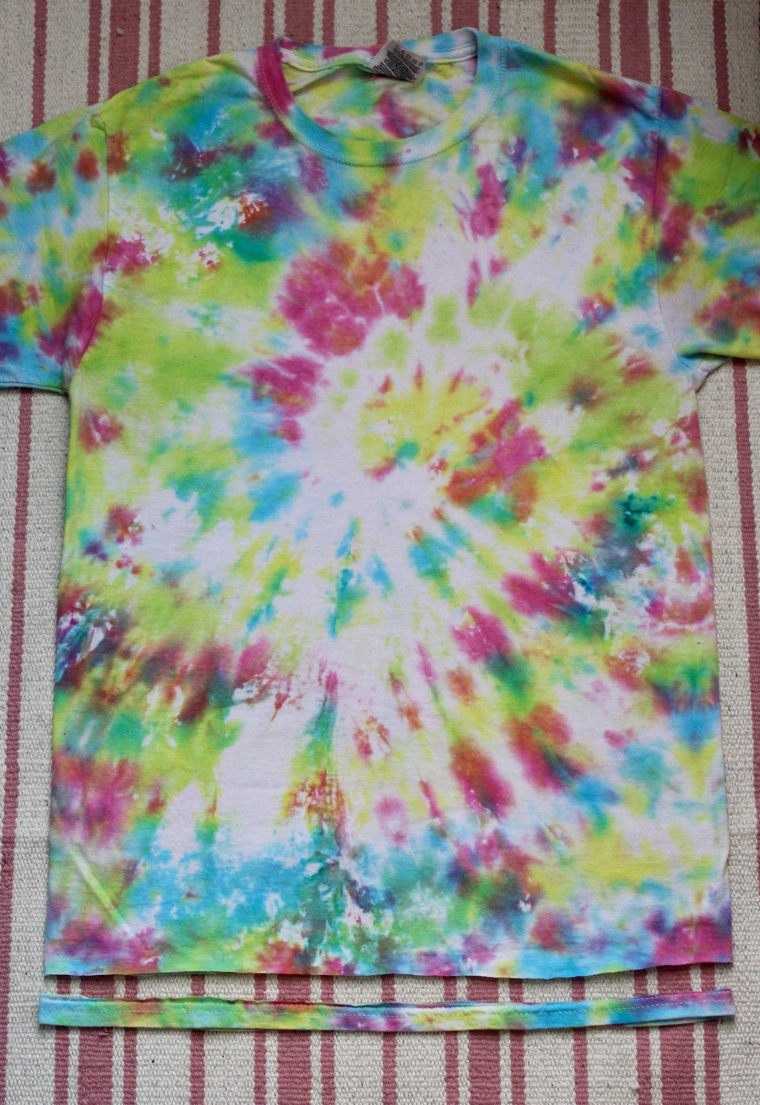
After you cut all the strips pull on them to give the shirt a nice look and your finished! The one tip I would give is if you have bigger boobs don’t cut the strips as high so it lays nicely.fullsizeoutput_1a3fullsizeoutput_49dfullsizeoutput_49f

fullsizeoutput_452
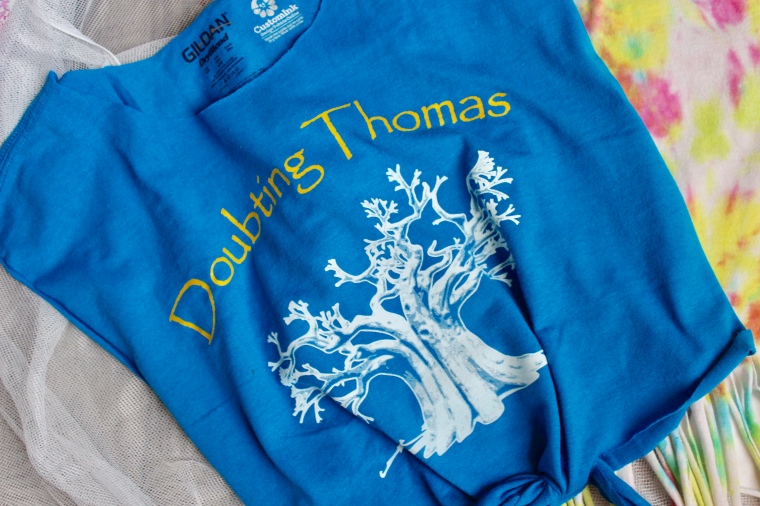
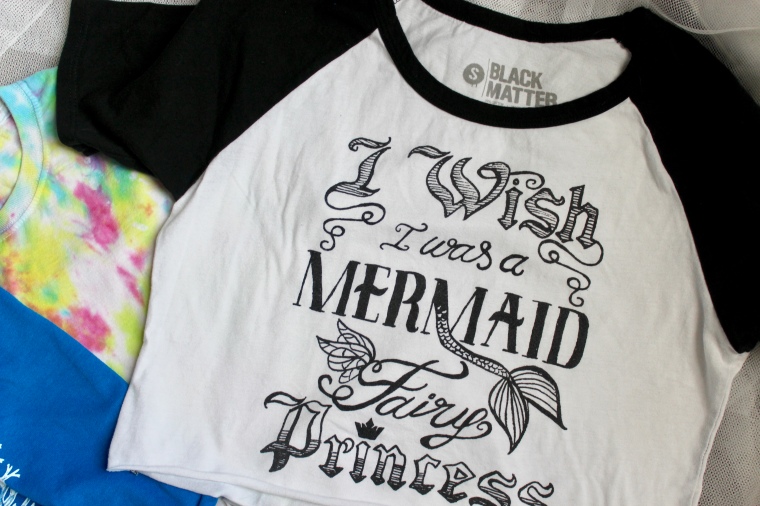
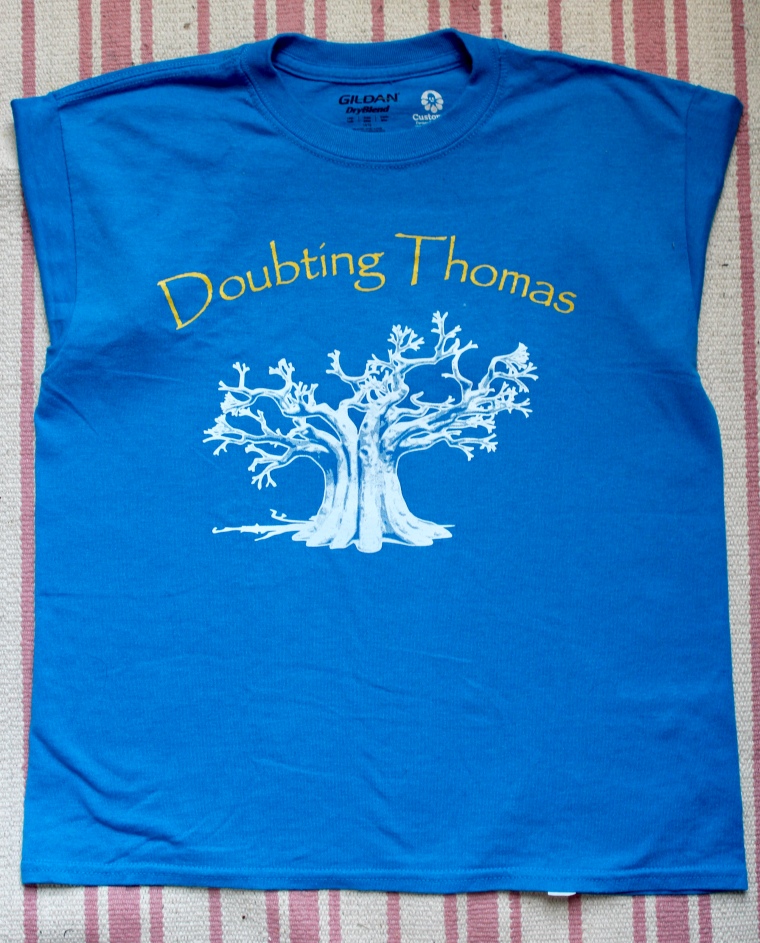
To start lay your top flat and cut off the sleeves, collar, and the bottom line. Then cut to the length you want except for two triangles in the middle that will be used to tie the shirt. fullsizeoutput_451
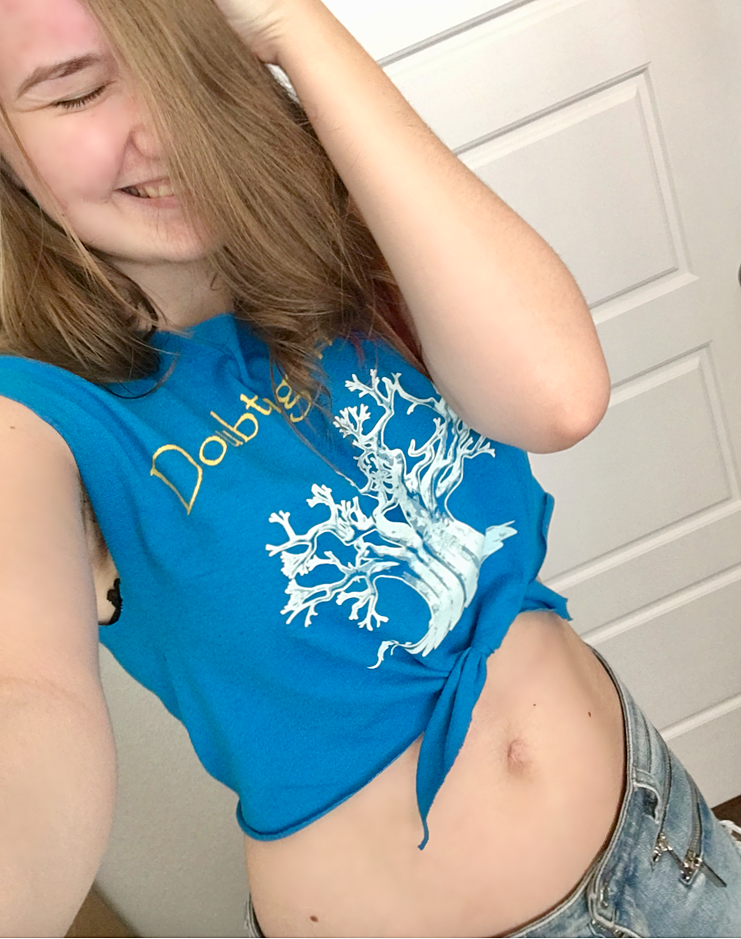
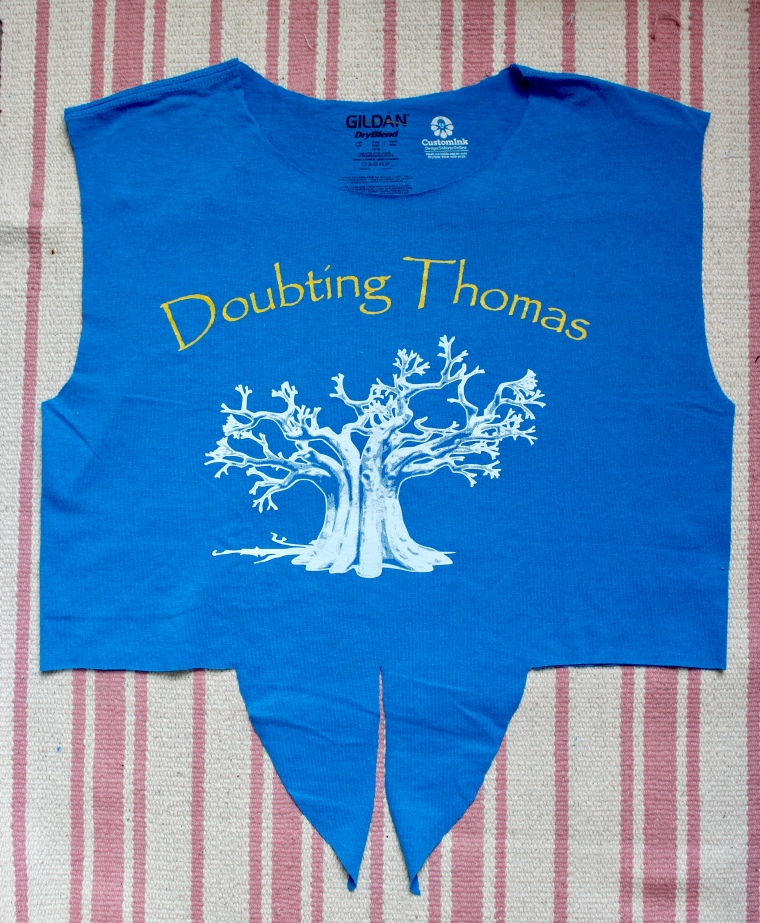
Tie the bottom and your finished! you now have the perfect top for summer. This one is probably my favorite, it turned out so cute, and I’ve never tired this style before so I was really pleased.fullsizeoutput_44fScreen Shot 2017-05-30 at 4.14.47 PM

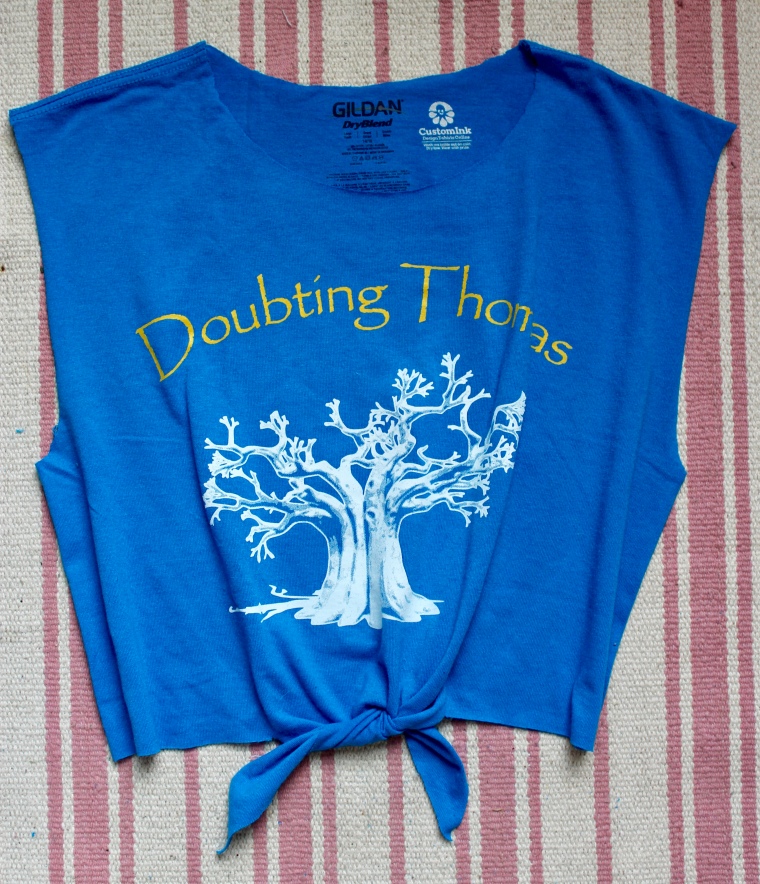
I hope you liked this post ❤ Have a great summer!
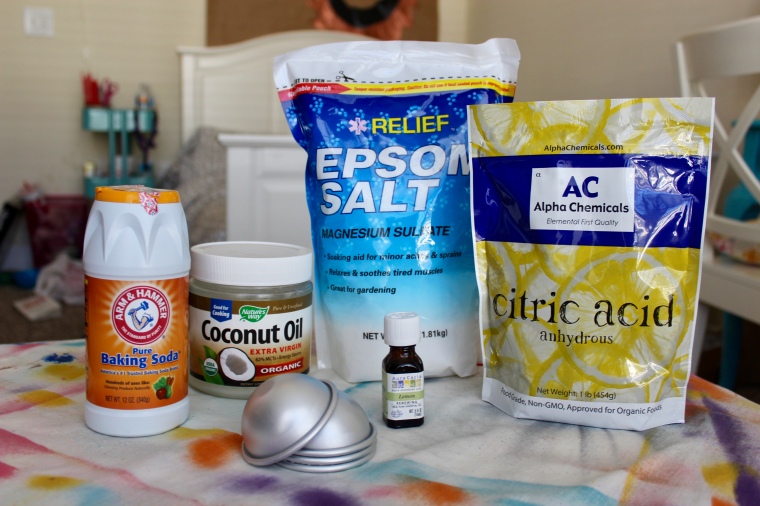
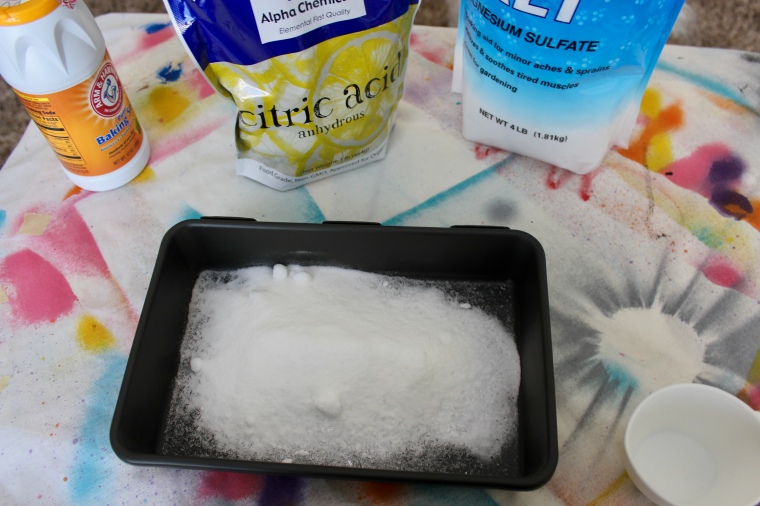
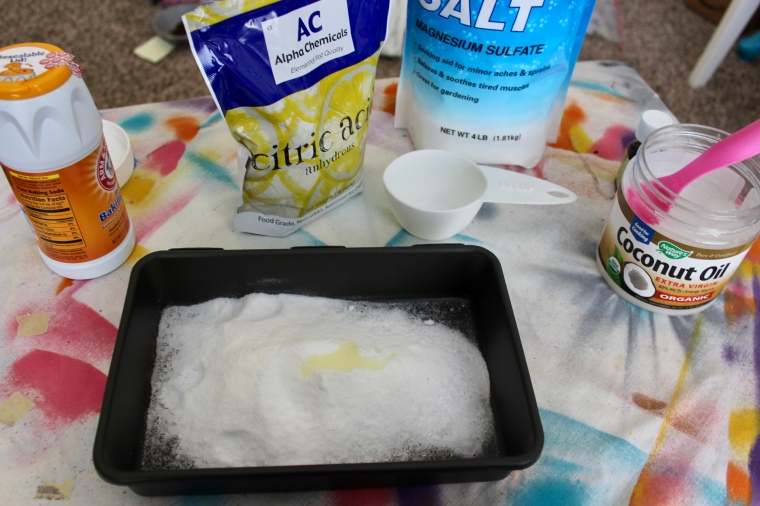
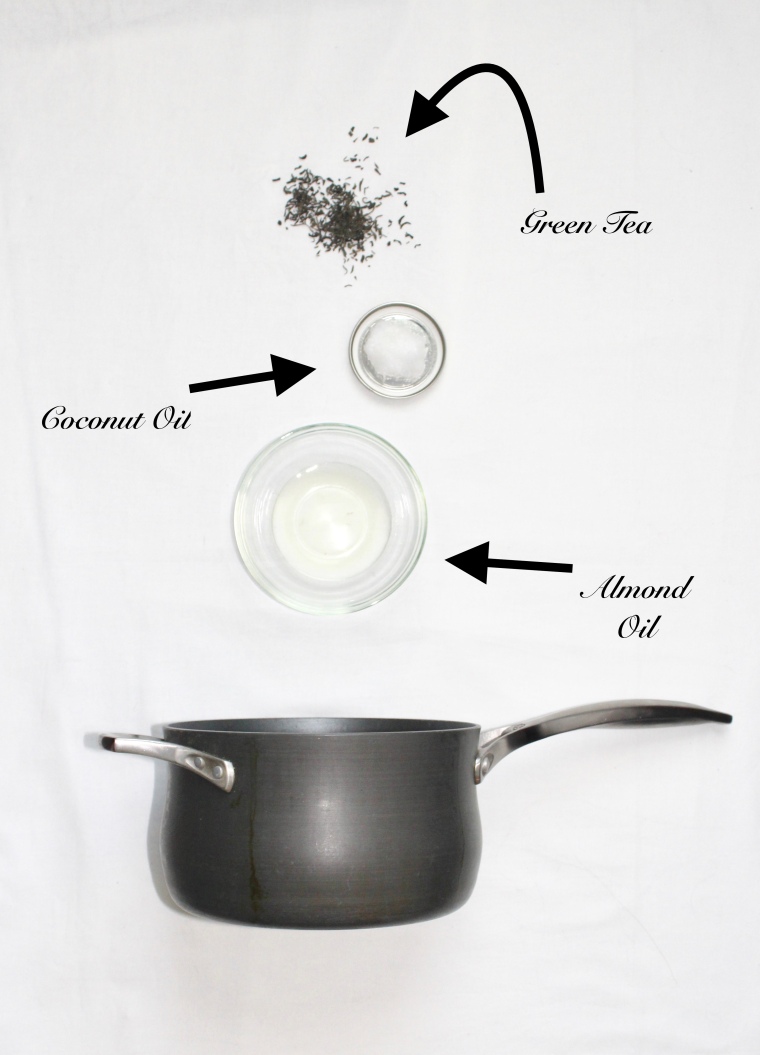
Easy DIY White Henna

White henna is a new trend; it looks a lot like regular henna, but since it doesn’t have henna leaves it doesn’t stain your skin. If you purchase white henna it usually last three to ten days, this can be washed off, but its perfect for sleepovers and photoshoots. I also know a lot of schools don’t allow henna, so this is something you can have for the weekend and get rid of before school. This is not actual henna paste, it’s just a fun cheap way to get a similar look. fullsizeoutput_35bfullsizeoutput_36efullsizeoutput_36d

What you’ll need:

  • Body or face paint
  • Elmers glue
  • Glitter
  • Corn Starch(optional)


Instructions:

  1. Mix equal parts paint and glue together
  2. Once mixed pour into baggie and cut a really small hole in the baggie(you can also use a needle to poke a hole in the corner of the bag before you pour the mixture into the baggie)
  3. Start your design, google and Pinterest are great places to look for inspiration
  4. Once you have your design sprinkle a little glitter over it. This does dry quite quickly, so I recommend putting the glitter on a you go
  5. Once your finished dust some corn starch over your design to help it stay a little better.

fullsizeoutput_370

If you have henna bottles I would recommend using that to create your design, I used a baggie to create this one. This will wash off and even though everything is non-toxic I wouldn’t recommend putting this on your face.

Hope you liked this post ❤ Please leave a comment down below if you try this!

DIY Eye Cream

fullsizeoutput_30dThings you’ll need:

  • Small container
  • 2 tab Coconut oil
  • 1 tab Almond oil
  • 1 bag Green tea
  • Double boiler(a glass bowl and a pot)

INSTRUCTIONS:

  1. Create a double boiler and place the coconut oil and almond oil in the bowl.
  2. Once the coconut oil has melted cut the tea bag open and pour in the contents. I like to use lose tea and I add one spoon of it.
  3. Let sit for 10-15 minutes and then let cool
  4. Once cool strain the mixture to remove the tea leaves and then pour into a container
  5. Keep in the fridge and the mixture is good for two weeks.


Green Tea Benefits: Green tea has anti-aging and antioxidant benefits that can help delay signs of skin aging, such as sun damage, age spots, fine lines and wrinkles. The green tea will also help reduce puffiness and dark circles around your eyes. fullsizeoutput_305

Coconut Oil Benefits: Coconut oil deeply hydrates your skin and prevents pre mature wrinkling and aging. It also has a lot of vitamin E which is great for your skin.fullsizeoutput_322.jpeg

Almond Oil Benefits: With regular use almond oil will lighten the skin under your eyes, reducing the appearance of dark circles. It is also high in vitamin A which can help with acne and vitamin E which will rejuvenate your skin.fullsizeoutput_31c

I like making a lot of my skin care products and this is one of my favorite recipes. A lot of good eye creams tend to be more on the expensive side, this cost a lot less and you know exactly what’s going in it.

Hope you found this helpful ❤

Tips to have healthy hair

I’ve been trying to grow my hair out for awhile now, but I wanted to keep it healthy looking even as it grew longer. I did a lot of research, had lots of trial and error, so here are the best tips I’ve found for having healthy hair:

  1. Use conditioner every time you wash your hair
  2. Brush your hair from the bottom up to reduce chance of breakage
  3. Get your hair trimmed often, this will remove split ends and damaged hair. Cutting your hair often does not make it grow faster, but it will make it appear thicker and healthier.
  4. Rinse your hair with cold water at the end of each shows to close the cuticle and seal in moisture
  5. Avoid heat tools as much as possible
  6. Make sure you eat enough protein like nuts, eggs, etc
  7. Don’t shampoo your hair daily; try to only shampoo your hair two to three times a week
  8. Avoid stress! Stress causes your hair to fall out and is just not good for you in general
  9. If you use dry shampoo, hair spray, or anything like that make sure to wash your that day or the next day; leaving it in can lead to dandruff and unhealthy hair.

Hoped this helped you out and if you have any tips please leave a comment. Thank you for reading x

Neutrogena Light Therapy Acne Mask Review+How to Use

fullsizeoutput_f4

I’ve been struggling with moderate acne for about two years now and nothing has really worked to clear it up. Youtube kept playing the ad for this mask, so I decided to give it a try. When you buy the mask it comes with an activator. Each activator has thirty sessions and after that you have to buy a new one, which is something I didn’t like about it. I wish that each activator came with sixty sessions, that way you would only half to replace it every two months instead of every month. The company says this masks treats mild to moderate acne.

fullsizeoutput_c6fullsizeoutput_c7

How to use:

  1. Connect the activator to the mask, each session lasts ten minutes. Use the mask once daily.
  2. Wash and dry your face before each session to remove oil and makeup.
  3. Put on the mask like you would a pair of glasses .
  4. Press and hold the power button for one second to begin your treatment.
  5. After ten minutes the mask will turn off automatically.
  6. After each session the number on the activator will go down and once it hits zero you half to purchase a new one.

fullsizeoutput_f3fullsizeoutput_cefullsizeoutput_cbfullsizeoutput_effullsizeoutput_f1

The blue and red lights treats acne by reducing the bacteria. The blue light kills bacteria and the red light reduces inflammation. By reducing bacteria you reduce the appearance of acne on the skin. Of course since this mask only treats acne caused by bacteria it doesn’t work for everyone.

I have moderate acne and dry skin, the mask helped clear a lot of the acne on my forehead, but the acne I get from stress on the side of my face stayed the same. I liked how easy the product was to use and that it was easy to incorporate it into my daily routine, but it didn’t work as well as I hoped. I won’t be continuing use of this product, if it had worked really well I would have been happy to pay fifteen dollars a month, but for something that only slightly helped it isn’t worth it. Of course different people have different causes for their acne so it’s worth a try if you have thirty dollars, but that may be a bit much for a maybe.

http://www.neutrogena.com/product/light%20therapy%20acne%20mask.do?utm_source=google&utm_medium=cpc&utm_campaign&utm_term&utm_content=%7Cmkwid%7CsbF1DXr8e_dc%7Cpcrid%7C147002708543  


Hopefully you found this post helpful x


Do not use this product if you are pregnant or nursing as the risks are unknown


Tips to Help Stay Organized

1. Have a visible calendar

If you live with other people having a calendar out where everyone can write if they have something going on is incredibly helpful. Its also great for just you to see what your month is like.

fullsizeoutput_bc

2. Set reminders on your phone

I’m really bad about forgetting little things, so I started setting reminders on my phone just to make sure that I don’t forget something. It also motivates me when I know I have something I need to, but I want to be lazy.

fullsizeoutput_bafullsizeoutput_b9

3. Come up with a system that works for you

I like to color coat. Everything has a different color, school is pink, personal is blue, etc. Its very visual and I find it extremely helpful.

img_2288

4. Have a list of things you need to accomplish/a to do list

This is also very visual. Having a list of things you need you need to get done makes it easier to plan out your day and it also makes you less likely to forget about something that needs to get done.

fullsizeoutput_b7

5. If you schedule something put it in your calendar 

A lot of things have to be planned in advance and when the date comes around it’s easy to forget that you had something to do. It also helps to make sure you don’t overbook your day.

fullsizeoutput_b3fullsizeoutput_b4

It’s now 2017! At the beginning of every year I get organized and it usually lasts till The end of August. This year I’m going to attempt to stay organized throughout the year. Probably won’t happen, but it’s fun to try. I hope you found this post helpful:)

DIY Bath Bombs

fullsizeoutput_89

Ingredients:

1 cup Baking soda

1/2 cup Epson salt

1/2 cup Citric acid

1 tsp Water

2 tsp Essential oil (amount changes depending on how strong your essential oil is)

3 tsp Coconut oil or olive oil

Food dye (optional)

Other: 

-Two containers (whatever you use will always smell like your essential oil)

-Something to mix with like a whisk. I don’t recommend using your hands to mix

-Spray bottle (optional, but helpful)

-Bath bomb molds


Instructions:

fullsizeoutput_8b

Step 1: Combine all your dry ingredients in one bowl. The epson salt, citric acid, and baking soda.

Step 2: Combine all your wet ingredients in another bowl. Coconut oil, water, and essential oil. If you want to add dye this is where you would add it.

fullsizeoutput_8c

Step 3: Slowly pour the wet ingredients into the dry ingredients and mix. If you have a spray bottle pour the wet ingredients into it and slowly spray it onto the dry ingredients and mix. You want to go slow to prevent it from creating a reaction before you put them into water.

fullsizeoutput_92fullsizeoutput_98

Step 4: Fill your molds and press together. Remove from molds and let dry, they should come right out.

fullsizeoutput_9ffullsizeoutput_9dfullsizeoutput_a2fullsizeoutput_a5

I choose to make lemon batch bombs, because lemon is supposed to help you wake up and I also opted not to add coloring for this batch. This recipe makes about 4 medium sized bath bombs. Of course you can use any essential oil you want. When it comes to the food dye just slowly add a few drops until you get a few shades darker than what you want, because when you add it to the dry mixture the color will lighten.

Hope you enjoyed this post -A